
So this post isn't going to really be about educational technology in a traditional sense. Consider this an excursion into "incidental learning" - lessons about educational technology from a seemingly unrelated experiment (namely, building a Halloween costume).
I'll start off by saying that I appreciate technology. I appreciate how easy the cloud has made my life. I appreciate how well-informed I am because of blogs, discussion forums, and other web 2.0 technologies (by "well-informed", I mean I like the diversity, opinions, and ideas I encounter). And I appreciate how little things - like cars, microwaves, planes, movies - have all been enhanced by technology.
My costume, an Iron Man Mark 42 (as featured in Iron Man 3), is a costume that I could not have even fathomed building ten years ago. But technology has made it possible for anyone armed with a hot glue gun, an Xacto knife, and determination, the ability to make something as complex as this:
 | |
|
I'd like to take you through the entire history of my build, and talk about how technology factors in.
I'll start off by reiterating that ten years ago, I never would have dreamed of creating this. But I had connected with an old high school friend on Facebook, Stan, last Halloween (2012), and asked him for some ideas on how to build a hardcore Batman costume. Check out his scary mask and prop collection:
 |
| I want my mommy! |
Turns out, some enterprising guy from Canada who goes by the name "Stealth", popularized a way to build Iron Man armors out of just foam. Stealth brought high end costuming to the people! What a hero! Check his work out at The Heroes Workshop channel on YouTube. By the way, I spent countless hours on YouTube over the past year educating myself on how to make my costume. There are other foam build superstars out there, too (like XRobots from the UK), that have contributed so much to the foam build community.
I also spent an awful lot of time looking at blogs, Google Images, and other resources to get a sense of the scale of the project I was about to embark on. I was able to aggregate all my online research with Evernote, a tool I strenuously recommend to educators and students alike. It is the industry standard for collecting and organizing research. I will be doing a blog in the future about leveraging Evernote in the classroom (and also comparing it to Microsoft OneNote). For a sense of what Evernote can do, you can see all the information I saved on both my Batman build from 2012 and Iron Man build from 2013.
The actual process of building the costume took about 150 hours, but required not much more than dedication and a tolerance for hot glue burns. The helmet - arguably the linchpin of any good costume - was only the second piece I built. In an effort to show how simple the process is, here is a photo of my helmet.
 |
| You can do this, too! |
The whole process of building starts with the design. I'm not talented at 3D modeling. I've used SketchUp a bit (and I love it - I would also recommend it to anyone who is making iBooks with iBooks Author). But some people out there (jackiesrockin, I'm talking to you!) are extremely talented at designing 3D models. And they are more than happy to post them in file sharing sites so anyone can download them.
Once you have obtained the files (most of them come in a .pdo format), you can load them into the free software known as Pepakura Viewer. It allows 3D neophytes (like myself) to open a .pdo file. The key feature of Pepakura Viewer is that it will take a 3D object file and "unfold" it into 2 dimensions so you can print it out on paper. The specifications can be tweaked so that the details are superfine (for assembling cardstock and fiberglass replicas) or somewhat rougher (for a less detailed foam build). If you monkey around in Pepakura Viewer, you can tweak the settings to make the pieces fit you better and also refine or erase detail work for different media. Happily, there are people (like Ironmaided and Speedtrix) who have done this already. All I had to do was find the proper files.
I have to say that the software is pretty sweet. I could rotate the object. Any time I clicked on a surface, the corresponding unfolded piece was highlighted (and vice versa).
I had to adjust the paper size (some files were on A4, and I only print on 8.5 x 11), but the whole process was pretty simple. Typically, if there is symmetry in the object (like on the helmet or chest), only the left side is printed - once you cut the pieces out and trace it on the foam, you can just flip the stencil over and trace it again. |
| Unfolding the secret to Iron Man's helmet. |
 |
| Pepakura Viewer let's me pretend I know something about 3D modeling. |
I realized that if I didn't somehow figure out which parts go where, it would be like assembling a puzzle with no picture. So I used the Snipping Tool from Windows 7 and pasted different angles of the 3D image from Pepakura into Microsoft Publisher. I was able to physically take a Sharpie and number the pieces once I printed them. Check out my super low-tech screen shot:
So I commandeered the dining room table and set out to make a costume! After printing the unfolded pieces, I used an Xacto knife to cut them all out. Then I placed them on the foam and used a fresh Xacto knife (paper dulls the blades very quickly, and you really want a sharp blade for the foam) to cut out the pieces. I also had the reference printouts I made using Publisher.
I used the hot glue gun to assemble the pieces. I discovered that it is not necessary to bevel the foam if you want it angled; Pepakura Viewer designs the pieces such that when they are assembled, all curves and angles are preserved. For me, this was a humbling lesson. I tend to trust technology to a point, but in my experience the human intellect trumps the computer. It was hard for me to let go of this mentality but I found that Pepakura Viewer was exceedingly precise when it came to designing the pieces. So precise that beveling the edges actually made the pieces not fit together properly. I cached away the lesson I learned (reluctance to relying on technology) for when I work with faculty - now I will recall the trepidation that comes with learning new technologies.
I should mention the role that Google Drive played in this endeavor, too. I stored all photos I found online in a folder called "Iron Man" on my Google Drive. I also stored all my plans from Publisher in the same folder. Sometimes I worked from my laptop, sometimes I worked from my desktop, and sometimes I worked from work (only on my lunch break!). Having the centralized location made it so that I did not need to worry about transporting files all over the place.
After I cut out and assembled all the pieces (I'd estimate about 1100 pieces), I coated them with Modge Podge (to seal the open cell foam), then primed and painted them. I used charcoal and paint to give the "battle damage" look to the pieces. This was partly because battle damage makes the suit look more authentic, and partly because the battle damage hid all the imperfections I made in my suit (give me a break! It was my first foam build!).
So that's it. I mean, there was a lot of mistakes, lessons-learned, burns, and tedious build sessions along the way, but it was fun. I would liken the experience to people who put puzzles together. There is gratification along the way as sections are solved. But the greatest feeling is when it is all done.
There was an awful lot of technology that I used in this experiment. And the technology I mentioned (all in bold) is technology that educators use on a daily basis. Technology we take for granted. Technology that we have customized for our personal selves.
Oh! And the best part of finishing a foam build? You can blog about it.
 |
| A 3D rendering, converted to 2D, printed on flat paper, will then be turned into a 3D model. Mind = blown. |
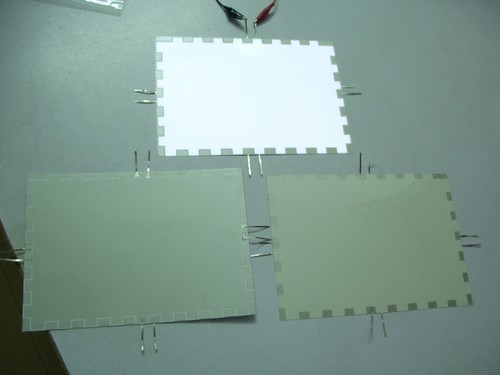
The preferred medium for foam builds is, well, foam. For some of the smaller pieces (like fingers) I used the small "foamies" you can get at Michael's. But the majority of the armor is made from thicker foam found in anti-fatigue floor mats. After reading about this in the discussion forums, I used Google Shopping to find out where to find the specific foam. I saw that Sears had it in stock, so I ordered it online, and then picked it up on my lunch break (I would later order a second roll from Amazon, as Sears did not have any in stock when I needed more).
 |
| This $25 roll of foam will someday be an entire Iron Man armor. |
 |
| Pepakura is Japanese for, "Just do what we say and you'll get a super sweet costume". |
I used the hot glue gun to assemble the pieces. I discovered that it is not necessary to bevel the foam if you want it angled; Pepakura Viewer designs the pieces such that when they are assembled, all curves and angles are preserved. For me, this was a humbling lesson. I tend to trust technology to a point, but in my experience the human intellect trumps the computer. It was hard for me to let go of this mentality but I found that Pepakura Viewer was exceedingly precise when it came to designing the pieces. So precise that beveling the edges actually made the pieces not fit together properly. I cached away the lesson I learned (reluctance to relying on technology) for when I work with faculty - now I will recall the trepidation that comes with learning new technologies.
 |
| Yes. My Iron Man armor was built on Crocs. I suspect Tony Stark is pretty jealous. |
After I cut out and assembled all the pieces (I'd estimate about 1100 pieces), I coated them with Modge Podge (to seal the open cell foam), then primed and painted them. I used charcoal and paint to give the "battle damage" look to the pieces. This was partly because battle damage makes the suit look more authentic, and partly because the battle damage hid all the imperfections I made in my suit (give me a break! It was my first foam build!).
 |
| Happily, the people I live with were okay with the house smelling like paint for a few weeks as the pieces dried. |
The last detail was the arc reactor. I was running short on time, so I could not put as much detail into it as I had wanted. But I was able to purchase an electro-luminescent panel ("EL" panels were popularized from the recent sequel to Tron, entitled Tron Legacy). So I quickly made a purchase from eBay and was able to score a sweet panel that would be the centerpiece of my armor.
 |
| EL panels are great for arc reactors, Tron costumes, and raves. Photo courtesy of eBay. |
There was an awful lot of technology that I used in this experiment. And the technology I mentioned (all in bold) is technology that educators use on a daily basis. Technology we take for granted. Technology that we have customized for our personal selves.
Facebook - Discussion Forums - YouTube - Evernote - Google Images - Evernote - 3D Modeling - Pepakura Viewer - Microsoft Publisher - Amazon - Google Drive - eBay - Cloud Computing - Blogs - Snipping Tool - Windows 7 - File Sharing - Ordering Online - Google Shopping
Oh! And the best part of finishing a foam build? You can blog about it.
 |
| Why yes... I did just save the world... |
 |
| After this photo, Whiplash and I duked it out in the streets. |


Give me the Ironman mark42 helmet
ReplyDeletePlease only helmet
oej0221@naver.com
I went to The Real Prop Forum (therpf.com), and used Blackout's foam files (unfolded by Streetsoul). You can find the thread at:
ReplyDeletehttp://www.therpf.com/f78/blackouts-mark-42-hd-pepakura-files-view-my-helmet-model-interactively-online-185331/?highlight=blackout
where did you get the pep file for the helmet? the page you linked did not have the pep files shown in the pictures above. i attempted to use those pictures as my file by printing them, but it didnt work very well. please help
ReplyDeleteI'm pretty sure I used the pep files for helmet from that URL (Blackout's Mark 42):
ReplyDeletehttp://www.therpf.com/f78/blackouts-mark-42-hd-pepakura-files-view-my-helmet-model-interactively-online-185331/?highlight=blackout
If the file is not there, I'd suggest rummaging through the posts in the thread listed in my post:
http://www.therpf.com/f24/jackieisrockins-iron-man-mk-42-pepakura-files-back-added-first-post-176839/
Good luck!
thanks. i have been to both of these pages multiple times, but i think i can find something
ReplyDeleteby the way, did you pay for your pep files? i have found mentioning s of pep files for the helmet on the site but have not yet found the file.
ReplyDeleteI did not pay for any of the plans... I had to open an account at some file sharing website, but I never spent money. Good luck!
DeletePlease give the ironman mark42 helmet simple to this email
ReplyDeleteoej0221@naver.com
I'm sorry - I do not have the files any more. I got them from therpf.com, and I suspect they are still there.
Delete